
 Skip to content
Elden Ring: Dung Eater [Questline, Lore & Ending]
![Elden Ring: Dung Eater [Questline, Lore & Ending]](https://exputer.com/wp-content/uploads/2023/05/Elden-Ring-Dung-Eaters-Complete-Questline-Lore-And-Ending-1.jpg "Elden Ring: Dung Eater [Questline, Lore & Ending]")
While the character may look broody at first, Elden Ring’s Dung Eater easily has one of the most detailed yet grotesque questlines in the entire game. Moreover, his quest connects several other NPCs, forcing you to choose which questline you want to follow. And if you solely decide to pursue Dung Eater’s path and uncover his lore bits, you’ll get one of the game’s alternate endings, The Blessing of Despair.
Key Takeaways
- Players are first introduced to Elden Ring’s Dung Eater at the Roundtable Hold once they reach the Altus Plateau.
- After exhausting his initial dialogue, they can now start pursuing his quest line, which includes the following procedure:
- Reach Leyndell and its main gate by following the east-leading trail from the Hermit Merchant’s Shack Site of Grace.
- Take the East Capital Rampart Site of Grace once you’re in the city, follow the left-hand side path, and pick up the First Seedbed Curse from the first floor.
- Talk to the Dung Eater to receive the Sewer-Gaol Key, and head to the Subterranean Shunning-Grounds from the Avenue Balcony Site of Grace.
- Grab the Underground Roadside Site of Grace and follow the narrow road to eventually find the Dung Eater’s real body locked behind a cell.
- Use the Sewer-Gaol Key to free the Dung Eater, and return to his room at the Roundtable Hold to find a message left behind.
- After that, fight and kill the Dung Eater at the lake near the Hermit Merchant’s Shack to receive the Sword of Milos.
- Now, defile the Dung Eater’s body back at his gaol by finding the other 4 Seedbed Curses in Volcano Manor, Leyndell, and Elphael.
- Once players have used all Seedbed Curses, they’ll receive the Mending Rune of the Fell Curse from the Dung Eater’s body.
- Additionally, players can also pick the Omen Armor set after revisiting the Dung Eater at the gaol again.
How To Complete Dung Eater’s Quest In Elden Ring?
Your first encounter with this NPC comes once you reach Elden Ring’s mid-game phase after getting to the Altus Plateau. You can access the Plateau region by going through the Ruin-Strewn Precipe in northern Liurnia or taking the Grand Lift of Dectus route.

- After reaching the Altus Plateau, teleport to the Roundtable Hold and head to the Twin Maiden Husk’s room next to Gideon’s office.
- Here, the previously locked door next to the Twin Maidens will be open, which you can enter to find the Dung Eater in Elden Ring sitting beside a corpse.
- Exhaust his dialogue, return to the Altus Plateau, and head to Leyndell, the Royal Capital.

Getting To Leyndell In The Altus Plateau
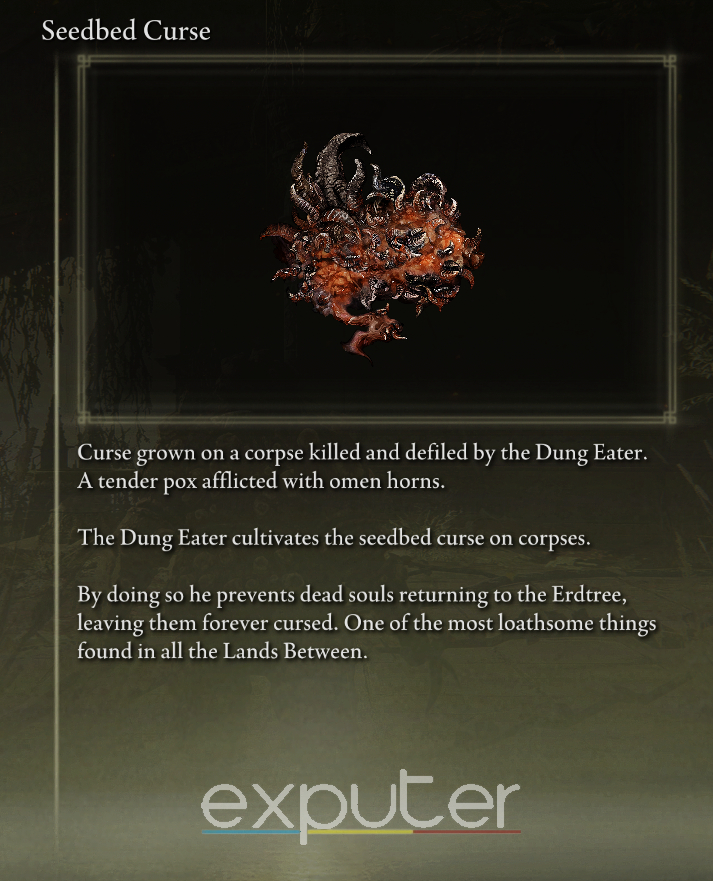
As you would’ve seen in your first interaction, Dung Eater’s quest in Elden Ring will remain stagnant for now. To progress it, you’ll first need to find a Seedbed Curse, a rare Key item. There are 5 Seedbed Curses scattered throughout the map, of which you can find 2 in Leyndell. For now, you’ll only need one of them, but you’ll have to find the rest later on.
- From the Hermit Merchant’s Shack Site of Grace, located at the northern side of the Plateau’s outer wall, follow the trail east to the Royal Capital’s gate.

-
- Use Torrent horse to avoid the Stone Golem archers along the way, and continue pursuing until you reach the gate.
- Once you reach the foot of the Capital, you’ll find a Draconic Tree Sentinel guarding its entrance, whom you’ll need to kill to proceed.

-
- After defeating the Draconic Tree Sentinel and getting his Dragon Greatclaw weapon along with the Dragonclaw Shield, head inside the main gate and follow the bridge to the Capital Rampart Site of Grace.

-
- Take the staircase and elevator in front of the Capital Rampart to proceed straight ahead until you’re at the Capital itself alongside the East Capital Rampart Site of Grace.

-
- From here, take a left and go straight ahead past the Oracle Envoys until you reach the end of the path, after which you need to drop down to the lower half of the balcony, head inside the building, and take the elevator on your right.
- Now, go to the building in front and head up the ladder next to the Perfumer inside, after which you’ll find a Seedbed Curse sitting on a corpse on the topmost floor.

Meeting The Dung Eater Below The Capital
After getting the Seedbed Curse, return to the Dung Eater at the Roundtable Hold, and exhaust his dialogue entirely to get the Sewer-Gaol Key to continue the questline. This key can open his prison cell in the Subterranean Shunning Grounds located below Leyndell.

-
- To reach the Subterranean Shunning Grounds, start from the aforementioned East Capital Rampart Site of Grace and go to the elevator you previously took to get to the Seedbed Curse.
- Once you’ve taken the elevator down, jump from its right side and head northwest until you reach the Capital’s main street.
- After that, make your way southwest, take the first right, and go down the staircase to access the Avenue Balcony Site of Grace.

-
- From here, proceed further down the staircase, take close to the left side of the balcony, and jump down once you’re near the giant dragon’s wing to land near the small well.

-
- Use the ladder next to the well to drop down to the sewer, and now it’s a straight path to ultimately reach the Shunning Grounds and the Underground Roadside Site of Grace inside one of the rooms.

-
- Rest at the Site of Grace, head back to the main road, and go northeast past the Omens until you see a small opening in the ground.

-
- Drop down from this rectangular latch and sprint along the narrow path past the rats and Miranda Sprouts until you reach the ladder at the trail’s end.
- Use the ladder to climb atop and take a right turn, after which you’ll see the Dung Eater’s real body in a cell banging his head against the wall in Elden Ring.

-
- Open the cell using your Sewer-Gaol Key, approach the Dung Eater, and tell him to leave the cell.

Killing The Dung Eater At The Outer Moat
Upon freeing the defiler from his cell, you must return to his room at the Roundtable Hold. Here, you’ll notice he’s gone from his original position, and instead, there will be a message on the ground saying, “I’ll defile you next. Come to the outer moat.”

-
- Once you read this message, head back to the Hermit Merchant’s Shack Site of Grace in the Altus Plateau, and follow the route you previously took to reach the Capital Rampart.
- However, once you’re directly beside the Minor Erdtree, go south until you reach a small lake at the bottom of the cliff.
- After reaching the lake, the Dung Eater in Elden Ring will spawn as an invader whom you must kill to progress the rest of the questline.
- He’ll primarily use his melee weapon and casting spells occasionally, so try to maintain some distance between yourself and him at all times.

Upon killing him, you’ll receive the Sword of Milos, an excellent weapon for melee builds that scales with Strength and Dexterity. And if you’re currently following Blackguard Big Boggart’s questline and lore, you’ll find him strapped to a chair near the moat. Unfortunately, his quest comes to a sorrowful end, as he’ll ask you to kill him after regrettably becoming one of Dung Eater’s victims.
Important: If you haven’t made it this far in Boggart’s quest and fight the Dung Eater first, then the quest will be locked for the rest of the playthrough. Therefore, you should try to progress Boggart’s storyline beforehand.
Finding The Other Seedbed Curses
With almost everything said and done, it’s time to find the remaining 4 Seedbed Curses to complete the questline and get Elden Ring’s Dung Eater’s armor and ending. It’s worth mentioning that if you’re trying to complete Seluvis’ quest, you can give the Dung Eater Seluvis’ potion to progress his quest further. However, this will bar you from completing Dung Eater’s own quest, so you need to choose which one you want to follow.
Second Seedbed Curse
The Second Seedbed Curse is near the West Capital Rampart Site of Grace in Leyndell. Starting from the aforementioned Avenue Balcony grace, move straight ahead and jump onto the giant dragon’s wings. Now, start climbing it until you reach the building atop, and after a few steps, you’ll find the Site of Grace along the narrow pathway.

-
- After taking the grace, make your way southeast towards the tree branches and jump from the broken railings to your left onto the ledge below.

-
- Once you’re at ground level, continue going southeast, following the wooden shacks to your right, then jump onto their roofs from the corner and follow them to the doorway leading inside the building.

-
- Upon entering the building, you’ll see an exact copy of the Roundtable Hold, with nearly an identical layout but excluding the NPCs, the Two Fingers, and the giant Site of Grace at the center.
- Make your way to the room where the Dung Eater usually rests, and you’ll find the Seedbed Curse atop the defiled corpse in Elden Ring.

Important: This abandoned Roundtable Hold houses several unique items and weapons. So be sure to explore it and loot anything you can fully.
Third Seedbed Curse
This Seedbed Curse is located near the Prayer Room Site of Grace in Elphael, Brace of the Haligtree, one of Elden Ring’s late-game locations. Therefore, you’ll have to grind a few levels and progress through most areas, like the Mountaintops of the Giants, before continuing Dung Eater’s quest.

- Starting from the Prayer Room Site of Grace found just after entering Elphael, head for the exit and follow along the narrow pathway.
- Head down the staircase towards the end of the path and jump onto the arch next to it.

-
- After that, drop down to the platform on your left, get onto the other arch in front of you, and ascend to the ledge at the top.
- Now, follow the trail along the ledge, and you’ll find your third Seedbed Curse next to the corpse at the end.

Remember to open the chest next to the ledge to get a Somber Ancient Dragon Smithing Stone, a legendary item for upgrading special weapons and shields to +10.
Fourth Seedbed Curse
Fortunately, this next Seedbed Curse is relatively easy to get since it’s near the same Prayer Room Site of Grace. In fact, It’s near the previous Seedbed Curse, too, so you won’t have to go out of your way to search for it in another area.
- Once you’ve collected the Seedbed Curse from the ledge, turn right and drop down to the platform below.
- Take another leap down and use your compass to head southeast until you reach the room with the Cleanrot Knights.

-
- Avoid the Cleanrot Knights inside and proceed straight ahead, and once you’re at the foot of the staircase outside the room, jump onto the arch on your left.

-
- From here, look to your right and jump down onto the narrow platform below.
- And now, simply head inside from the doorway behind you, descend the staircase, and you should spot the illuminating corpse to your right with the Seedbed Curse resting on top of it.

Fifth Seedbed Curse
The fifth and final Seedbed Curse is near the Temple of Eiglay Site of Grace south of Volcano Manor, where you find Lady Tanith and, eventually, Rykard, Lord of Blasphemy. Remember that the Temple will be protected by the Godskin Noble inside, whom you’ll first have to kill to get the grace.

-
- Starting from the Temple’s Site of Grace, take the lift on your right and proceed straight ahead.
- From the balcony, jump off to the lava-surrounding platform and continue down the narrow path.

-
- Traverse over the molten lava, and as you move along, you’ll be met by an Abductor Virgin with a small doorway behind it.

-
- Avoid the enemy and enter the building via the exit, continuing the trail upwards through the wooden door on your right.
- Follow the staircase, and eventually, you’ll be met by another entrance behind the Man-Serpents leading to the building in front.

-
- Head out of the room via the exit on the far right and take the staircase that leads to the upper floor behind you.
- Once you’re upstairs, you’ll need 2 Stonesword Keys to remove the fog wall over the door and progress forward.

-
- After inserting the Stonesword Keys, carefully drop to the ground floor by jumping onto the dangling metal cages.

-
- Upon reaching the bottom, avoid the small Albinauric-type enemies surrounding the area and head southwest opposite the building’s exit, where you’ll find the last Seedbed Curse sitting atop the corpse.

The Mending Rune And Dung Eater’s Armor
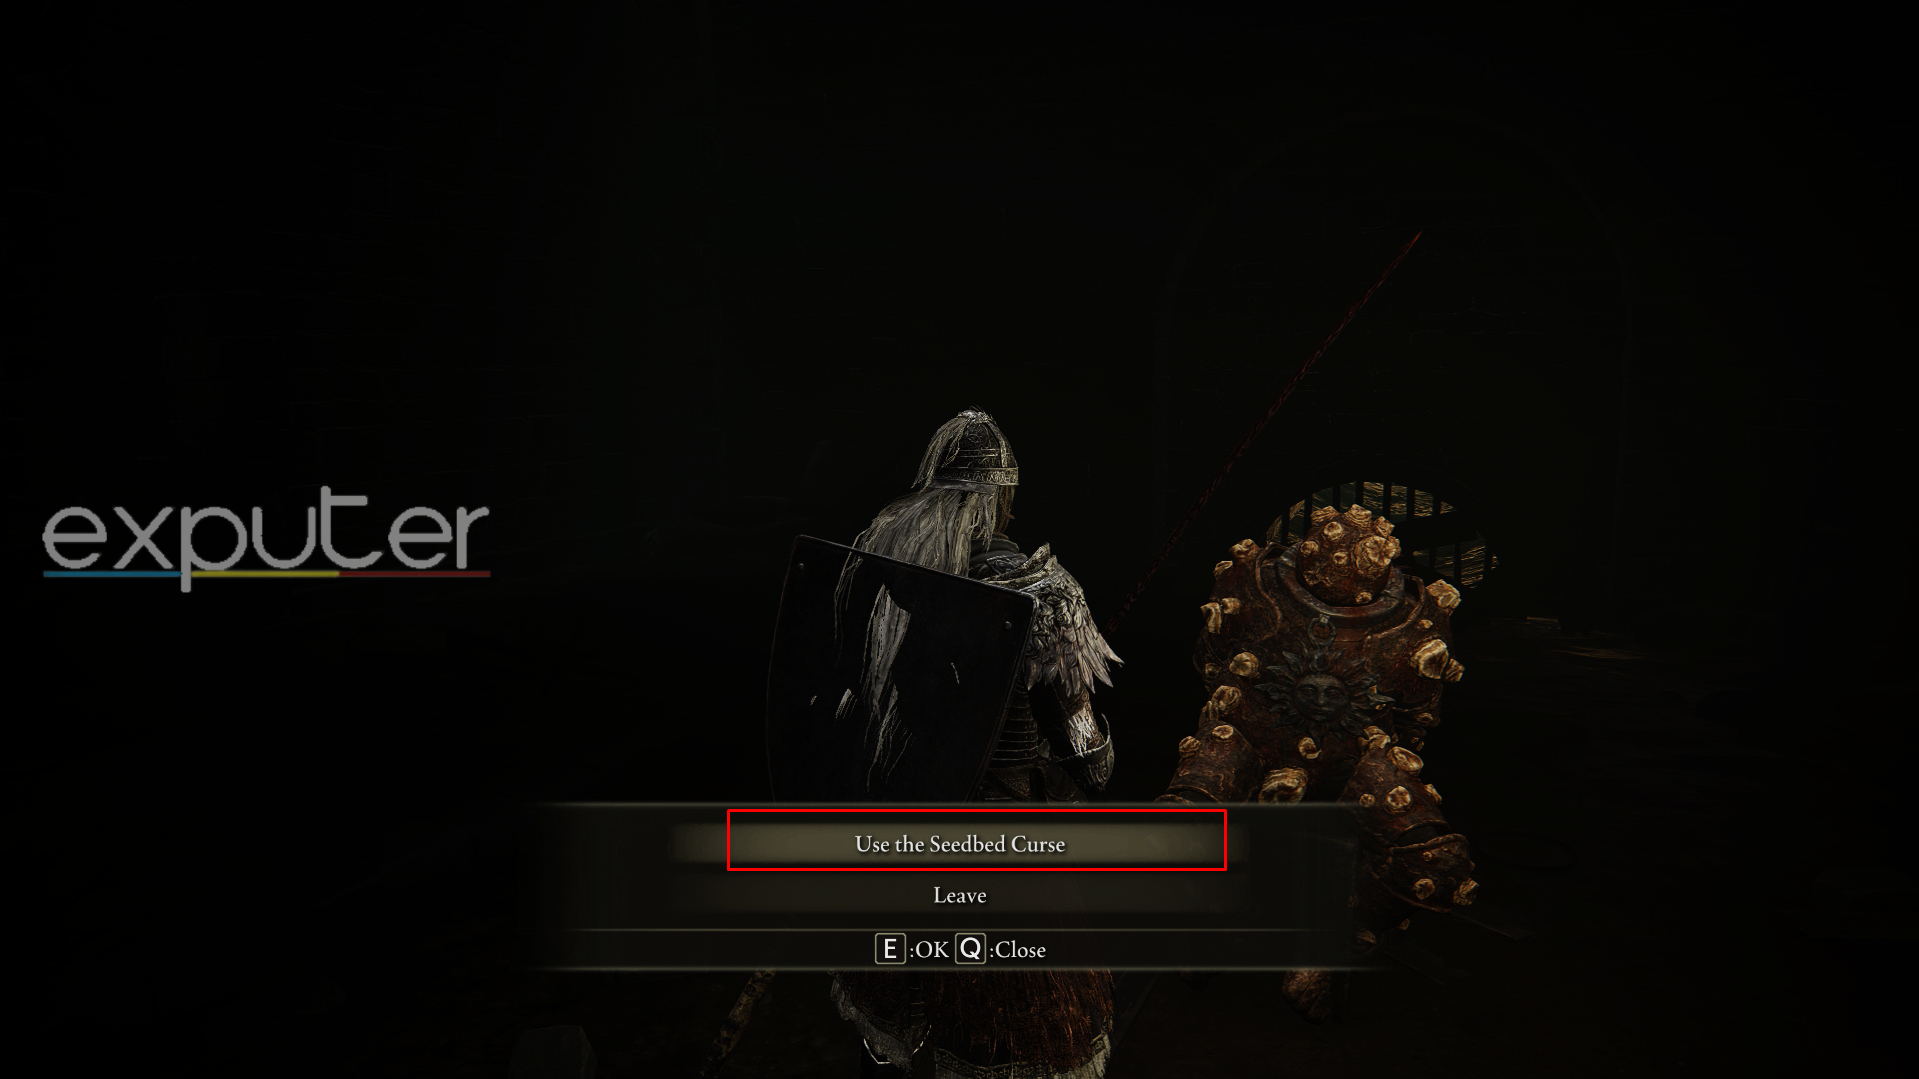
With all the Seedbed Curses in possession, you must return to the Dung Eater in the Subterranean Shunning-Grounds to perform defilement yourself, which is probably the most unsettling part of this questline. Head back to the Sewer Gaol from the Underground Roadside Site of Grace, and you’ll see Dung Eater strapped to a chair inside.
- After exhausting his initial dialogue, select the “Use Seedbed Curse” option and use your Seedbed Curses to begin the defiling process.
-
- Upon a brief cutscene, you can now grab the Mending Rune of the Fell Curse, the Key item needed to get the Blessing of Despair ending.

-
- Furthermore, reloading the area or returning to this location from the aforementioned Site of Grace will let you pick the Omen Armor set, which includes the following:
- Omen Helm
- Omen Armor
- Omen Greaves
- Omen Gauntlets
- Furthermore, reloading the area or returning to this location from the aforementioned Site of Grace will let you pick the Omen Armor set, which includes the following:
The Omen set is also one of the heaviest armor sets, providing exceptional poise and Physical Damage resistance if you’ve reserved enough equipment load for wearing it. Along with that, it has the highest Lightning Damage Negation and one of the best Holy Damage Negation out of any in-game armor. As such, it’s an ideal set for Strength builds that have likely spent most of their runes leveling up Endurance.
How To Get Elden Ring’s Dung Eater Ending?
After beating the final boss, you can either “Mend the Elden Ring” to trigger the regular Age of Fracture ending or get Dung Eater’s Blessing of Despair ending by selecting the “Use Mending Rune of the Fell Curse” option. Choosing the Dung Eater’s resolve will result in a different, viler conclusion with a unique dialogue by the narrator.

It’s worth mentioning that some players have reported that the Dung Eater doesn’t drop the Mending Rune once his quest is completed. If you face a similar issue, try reloading your save.
Dung Eater’s Lore
The Dung Eater, originally named “Milos,” was born tarnished, yet he wished to be an Omen, as stated by the Omen Helm’s lore description. This can also be seen through his armor set, where he wears the attire of an omen due to their praised strength given to them by birth and to punish all others who can be classified as “blessed” in the Lands Between. So, his objective became to defile and inflict suffering upon everyone.

According to the lore description Seedbed Curses, which the Dung Eater creates, defilement disallows the usual rebirth granted to the souls of all beings after they die. Their spirit can no longer reach the Erdtree, just as the Omen’s souls.
To make it worse, this curse carries on to the accursed’s offspring for generations. The defiling process is equally horrific, as you can hear from the screams of the Dung Eater when you defile him with the Seedbed Curses or when he defiles Boggart at the moat.
Toward the end of the questline, the Dung Eater sees himself in you and trusts you to carry his work across Elden Ring’s world. Thus comes the Blessing of Despair Ending, where the Lands Between is eternally defiled for generations. The Erdtree is no longer a savior that reincarnates its people, making the entirety of the Golden Order powerless. As such, many players consider this the worst ending in Elden Ring.
That wraps up the guide on Elden Ring’s Dung Eater, detailing his lore, questline, and procedure to get his rather unpleasant ending. All things considered, it wouldn’t be a stretch to call this NPC a living monster with one of the most horrific questlines. So if you want to learn more about the Dung Eater’s morals and intentions, try visiting this Subreddit Post to indulge in his questionable lore.
To follow more intriguing NPC questlines and lore arcs like Dung Eater’s, here is a guide on completing Ranni’s Quest in Elden Ring. Besides that, consider reading up on an optimal Blasphemous Blade build if you’re looking for a powerful Strength weapon to pair with your Omen set. And uncover other in-game secrets by learning about the Age of Absolute ending.
Next:
Was this article helpful?
Thanks! Do share your feedback with us. ⚡
How could we improve this post? Please Help us. ✍


